
I guess when I started crocheting, I did simple things like hats and scarves. But, as I've aged (cmon now, I'm not THAT old) I've progressed in my crochet. Simple things like hats and scarves no longer hold my interest as much.
BUT, you tell me to make something that is three-dimensional, and I am ALL OVER that shit like white on rice.
But what I didn't realize was that while starting a 3D object is quite simple, finishing it can be frustrating and tedious AF.
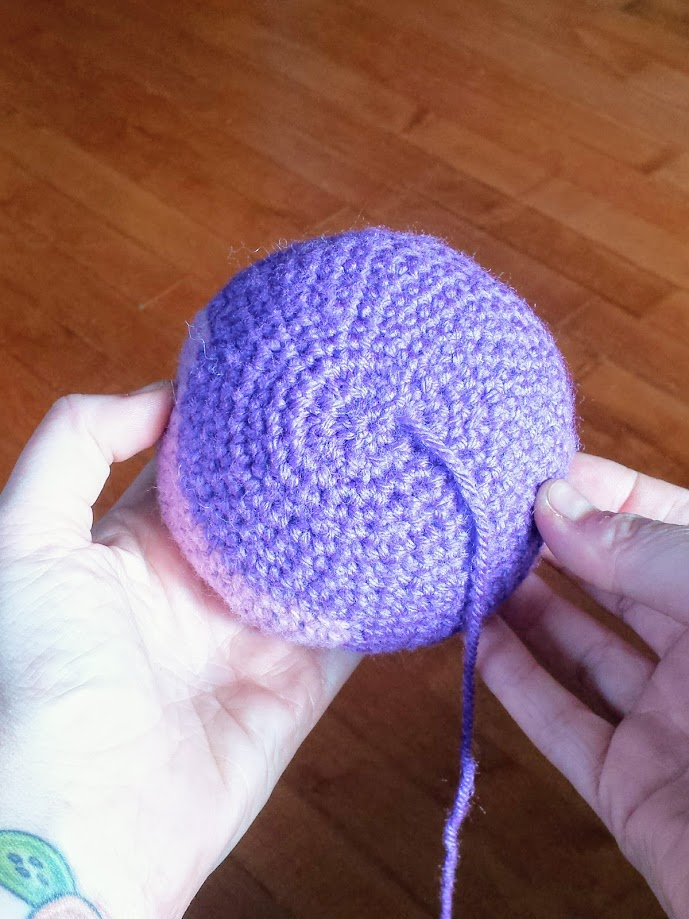
How small should I make the last round? When do I stuff my object? What If I need the top to be on bottom, but my bottom looks like crap? You can TOTALLY tell where I closed off.
Sound familiar? Then, read on, my lovely Interwebs friend.
Amigurumi (tiny crocheted toys and dolls) can be amazing and fun, but since they ARE so small, they leave very little room for error. When I started making more and more of these cute little amigurumis, I learned quite quickly that having a nice, round, which-end-is-up-and-which-end-is-down sort of an object is quite desirable. So, that is why I bring you this tutorial to make your finished pieces look so spot-on professional, that even YOU will have a hard time deciphering when you ended.
Coupling this technique with my invisible decrease technique will give you flawless crochet results every. single. time.
See how BEAUTIFUL that is?!
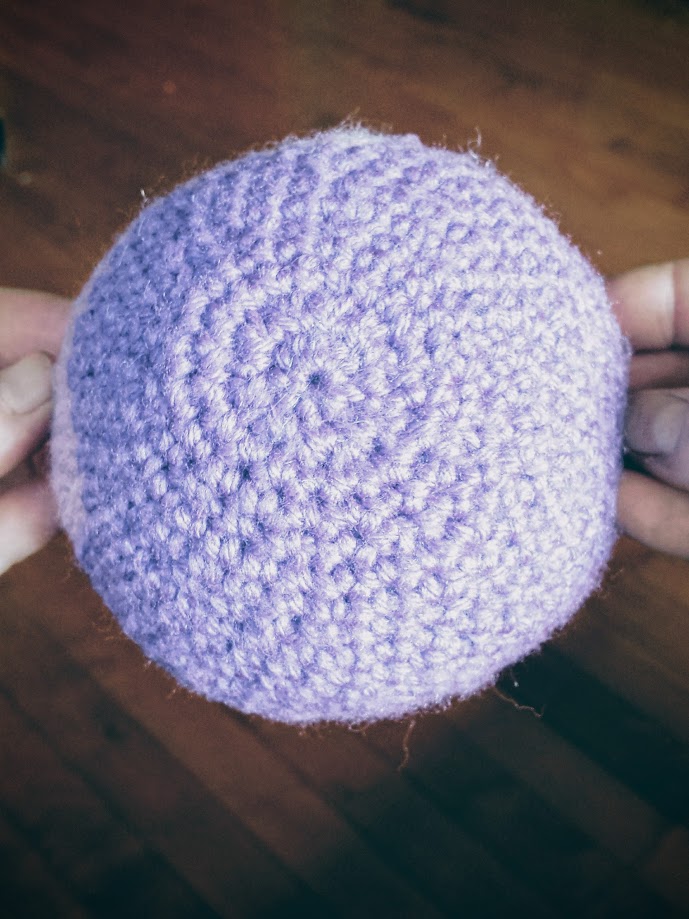
It kind of looks like this is the BEGINNING round, but it is the END round.
It just LOOKS like I am a magician, but I am really not.
So, to start: this technique works best if your final round has less than 10 stitches, but I will explain a bit later how to adjust the technique to make it work for more than 10 stitches!
Start by pulling your yarn all the way through the final single crochet.

Next, reinsert your hook into the front loop only of the first single crochet of the round (directly to the left of where you left your long tail hang from)

Pull the yarn tail all the way through the loop.

Repeat for each loop around, pulling the yarn all the way through each time.

When you get back to the beginning, insert your hook into the first single crochet again.
Pull yarn tail through all the way one last time.

Now, pull on the string.
Here, watch this ridiculously satisfying video of the string tightening process.
It's like watching one of those satisfying video compilations on repeat.
Like, seriously. How many times can I watch that person cut through the kinetic sand?
A million and twelve, ladies and gentlemen. A million and twelve.
No comments:
Post a Comment